Collaborative Reverse Engineering with Ghidra Server
DWORDs with friends

If you’ve been using Ghidra for a while, your workflow is probably similar to mine. You’ve got a binary you’re interested in untangling, so what do you do? You open up Ghidra, create a new project, drag your file over, and start digging. Sooner or later, you encounter a huge binary. Maybe it’s statically linked and you’re left with hundreds of megabytes of function spaghetti. You can tackle it alone like you’ve been doing, but this time you think it’s best if you hit up some friends.
You’ve got your group. Everyone excited to go code diving with you…but now you’ve got another problem. How do you collaborate? How do you share discoveries?
When Ghidra asks if you’d like to create a shared or non-shared project, you probably don’t give it a second thought––non-shared of course! What’s a shared project anyhow? You might be surprised to learn that Ghidra has tools for collaboration right of the box. If you think about its origins as a tool used by the NSA’s presumably large teams of reverse engineers, it makes sense. Your group might not be a team of highly specialized experts, but familiarity with how to use these tools will certainly be beneficial.
I’m trying something a little different with this post. Instead of presenting sections of information, I’m going to write out some of the questions I had while exploring this system and the answers I’ve discovered. This isn’t meant to be a comprehensive guide, but I hope it answers something you’re curious about. If you have other questions, I’m happy to take a shot at answering them 😃
Shared Projects
What’s a shared project?
Shared and non-shared projects don’t differ by much. If you’re familiar with git, a shared project is like a git repository that’s been pushed to a server. Shared projects facilitate collaboration by allowing you to share programs and the annotations made to them as part of the reverse engineering process. How you go about making those annotations is pretty much the same. Sharing them occurs mostly in the Project Window, where you can check in files, push your changes, pull in changes and files from collaborators, view version history , and explore commits made.
What do I need to create a shared project?
You need a Ghidra Server instance deployed locally or on a server. Ghidra Server is distributed with your Ghidra release and is included in the <ghidra_root>/server directory. Your server must also have some users provisioned.
How do I create a server?
If you’re a masochist, you can consult the Ghidra server documentation available at <ghidra_root>/server/svrREADME.html. It’s not the most pleasant documentation to read through, but it gets the job done. You can also consult Chapter 11 of The Ghidra Book, which walks through setting up a bare metal Ghidra server.
…or you can take the easy path with Docker and my “one-click” bytehow/ghidra-server container image. When launching the container you have the option of providing a GHIDRA_USERS environment variable which is a space separated-list of users to create. All users will be admins, and all will have the initial password of changeme which Ghidra will require you to change on first login.
docker exec into the container and use the provided svrAdmin script. This script is documented in the Server Administration section of the Ghidra Server docs.What’s the difference between a project and a repository?
A project, shared or not, is your local copy of what you’re working on. If it’s a shared project, it’s backed by a repository hosted on a Ghidra Server. A project is like doing a git clone. The repository is what you’re “cloning” from the Ghidra Server.
How do I create a new shared project?
From the Project View, File -> New Project -> Shared Project
Enter the IP/hostname and port of your Ghidra Server. You’ll then be presented with a dialogue asking you to either choose an existing repository or create a new one. Here I’m creating a new repository my-new-project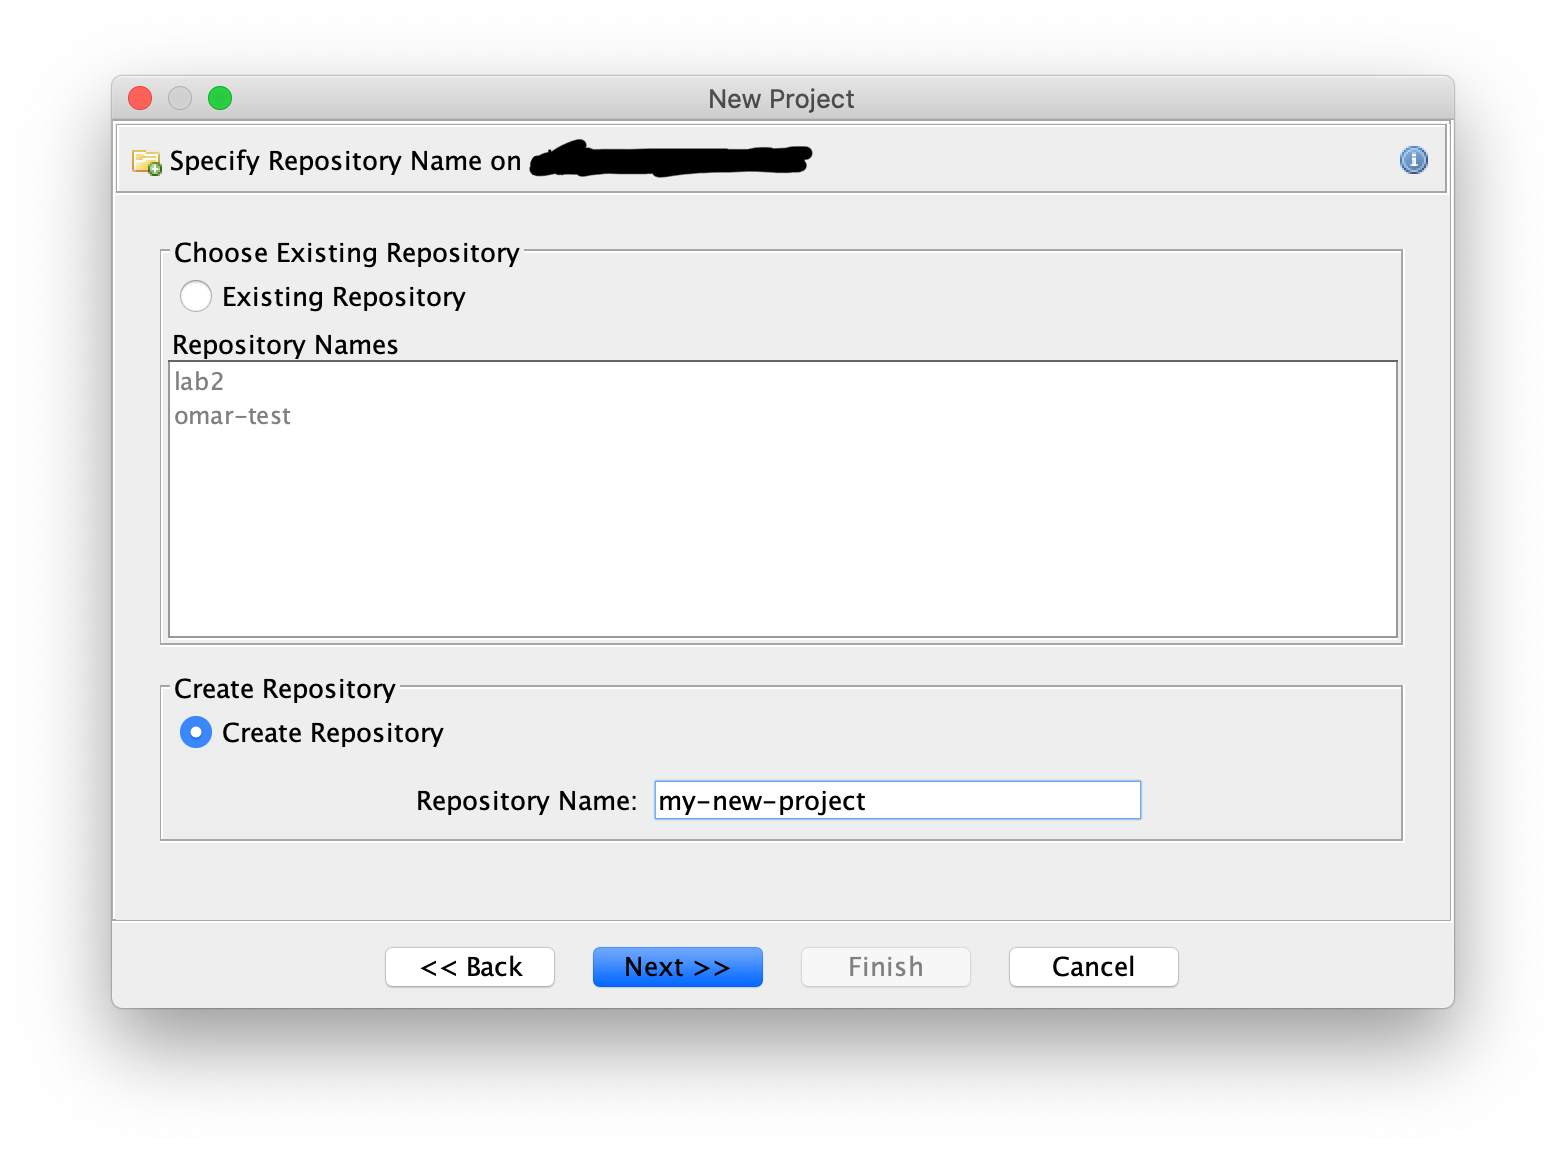
You’ll then be asked to add users to the project
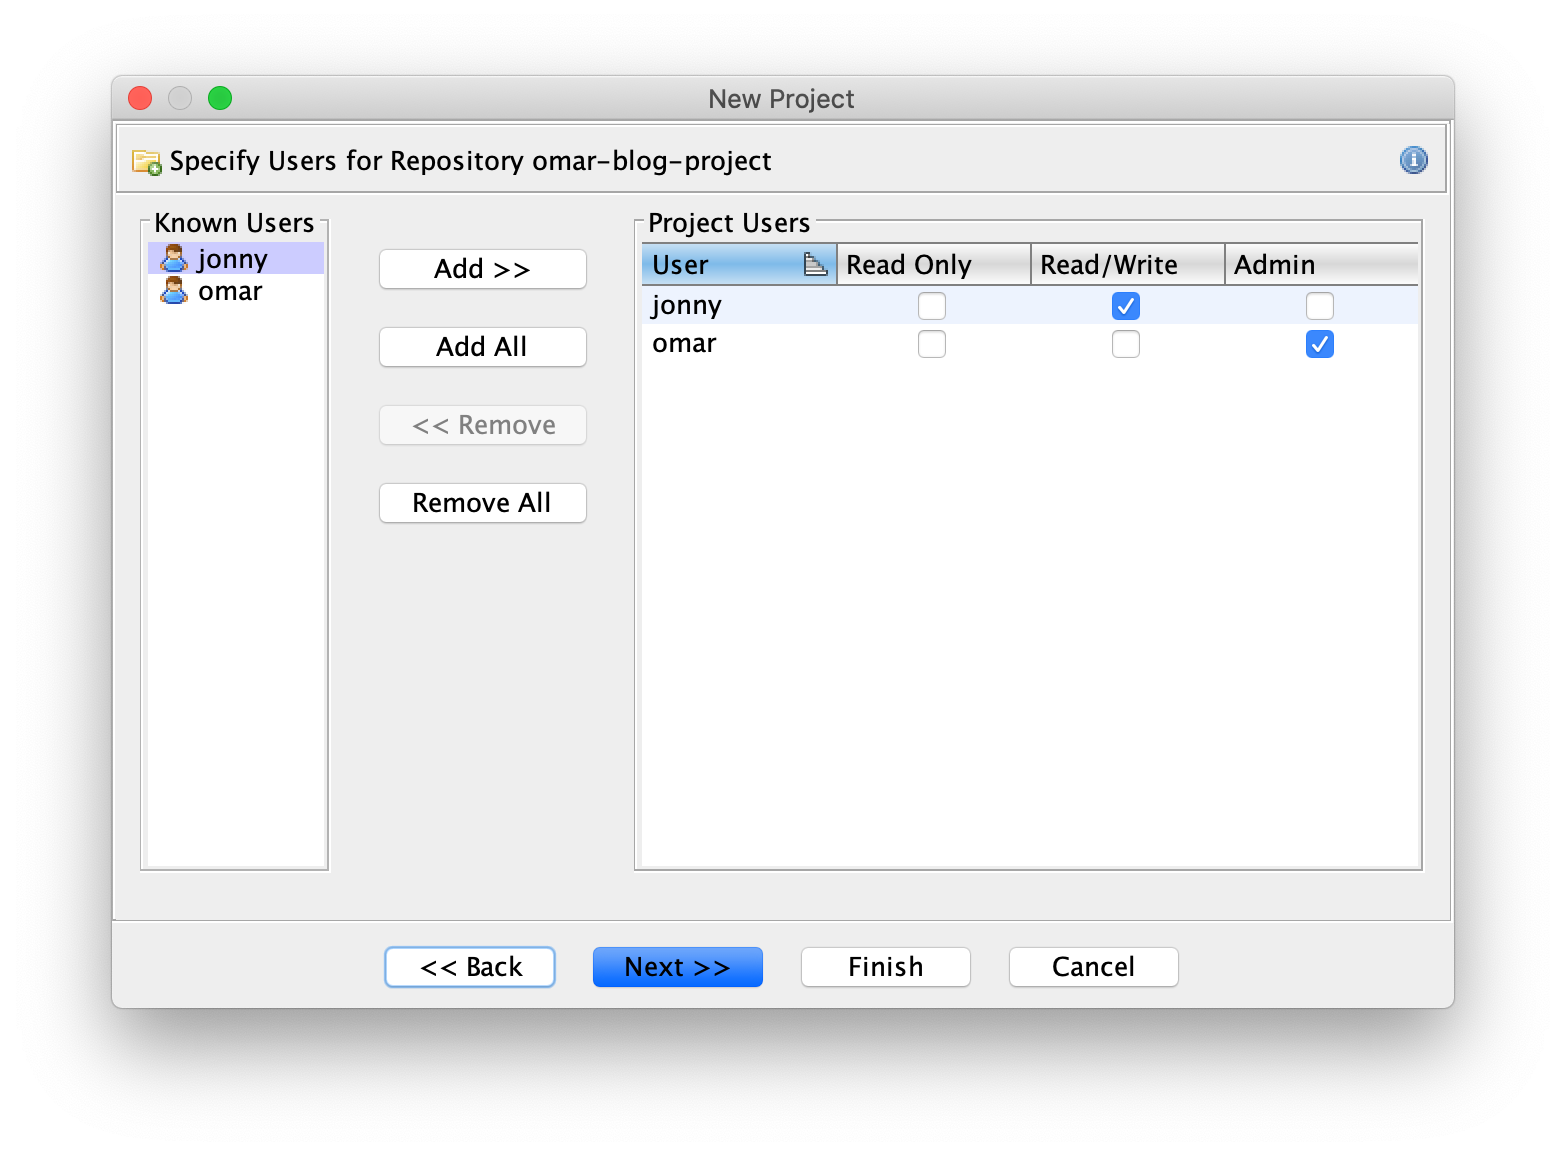
As the project creator, you’re the admin for the project by default. You can designate other users with different permissions
- Read Only - The user can only download files. Check outs are not permitted, and consequently, neither are check ins.
- Read/Write - The user can check out files and commit changes.
- Admin - Can do everything that the Read/Write user can do, but has the ability to manage the user access list, and terminate other user check outs (described later in the post).
After configuring users, you’ll then chose the local project name and location. This process is like creating a new repository on a git server, then cloning the project locally.
Files
How do I pull down a project from a Ghidra Server?
From the Project View, File -> New Project -> Shared Project. Enter your server information. As described earlier, you can choose either an existing repository that you’ve been added to as a user, or create a new one. We want the latter.
You then choose where you want to save this project locally and what you’d like to name it.
How do I add files to a shared project?
From the Project View or Code Browser, press I and select the file you’d like to add, or use File -> Import File. To make this file available to others, you need to add it to version control either by right clicking the file in the Project View and selecting Add to Version Control, or clicking on the matching icon in the top left of the toolbar

This is like git add followed by git commit.
How do I add files from a non shared project to a shared project?
From the Project View, after opening the shared project, Project -> View Project. Select the local project you want to add files from. It’ll be opened in the right side of the window. Drag over the files you’d like to add, and add them to version control as described above
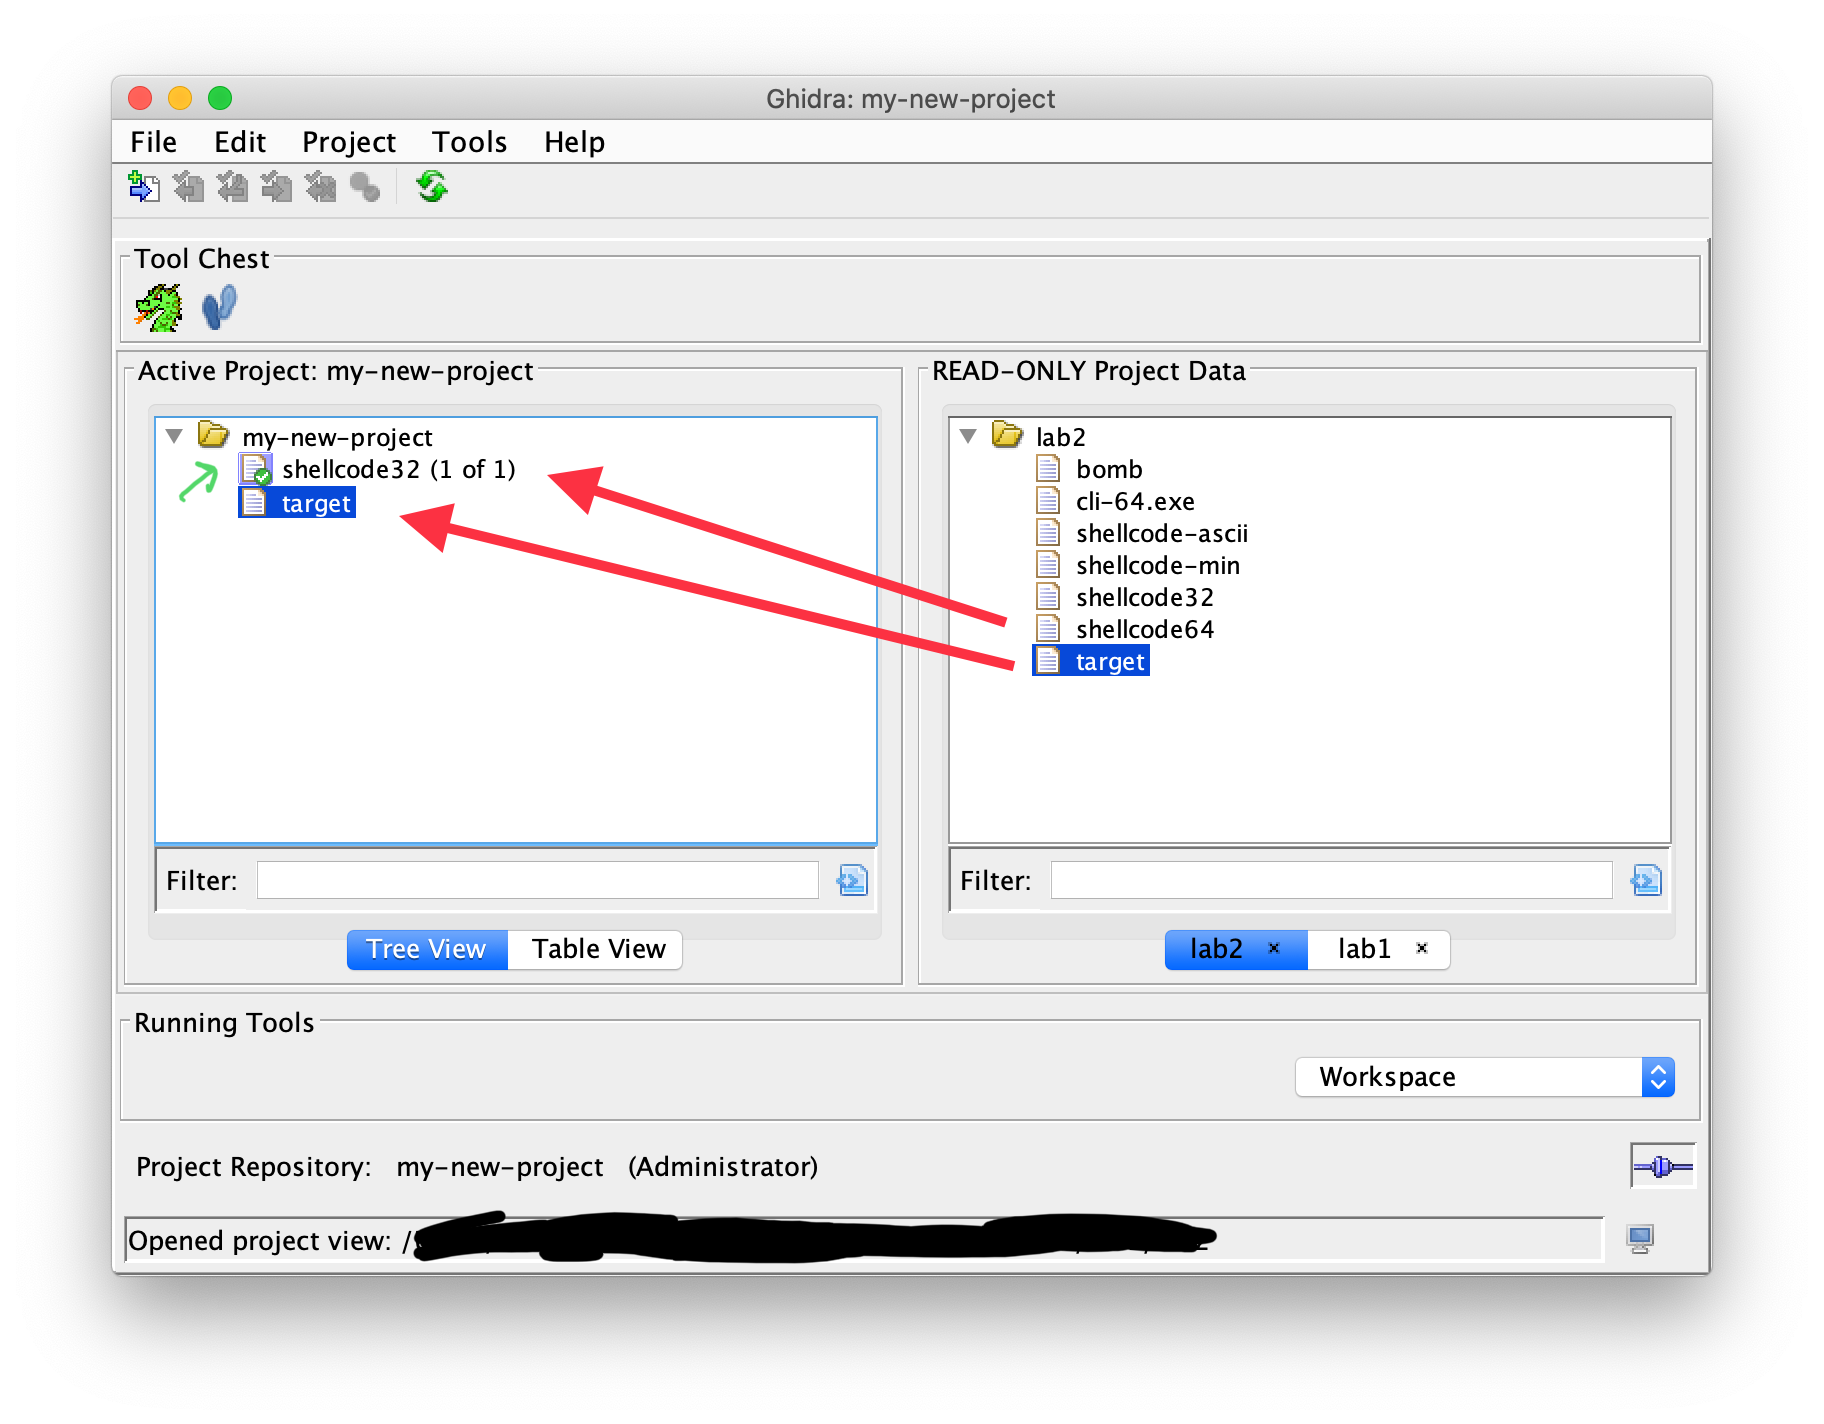
Here, I’ve copied shellcode32 and target from my local lab2 project. If you take a look, I’ve only added shellcode32 to version control (as indicated by the version number (1 of 1)) and kept it checked out (as indicated by the green check mark). Other users can see shellcode32, but not target when they view the repository.
This is like
| |
How do I create a shared project from a local project?
You must first create a new shared project and repository as described above. Then, add all files from your local project to the shared project. If there’s a better way to do this, please let me know…
Commits
How do I check out a file?
In the Project View, right click the file and select Check Out, or click the matching icon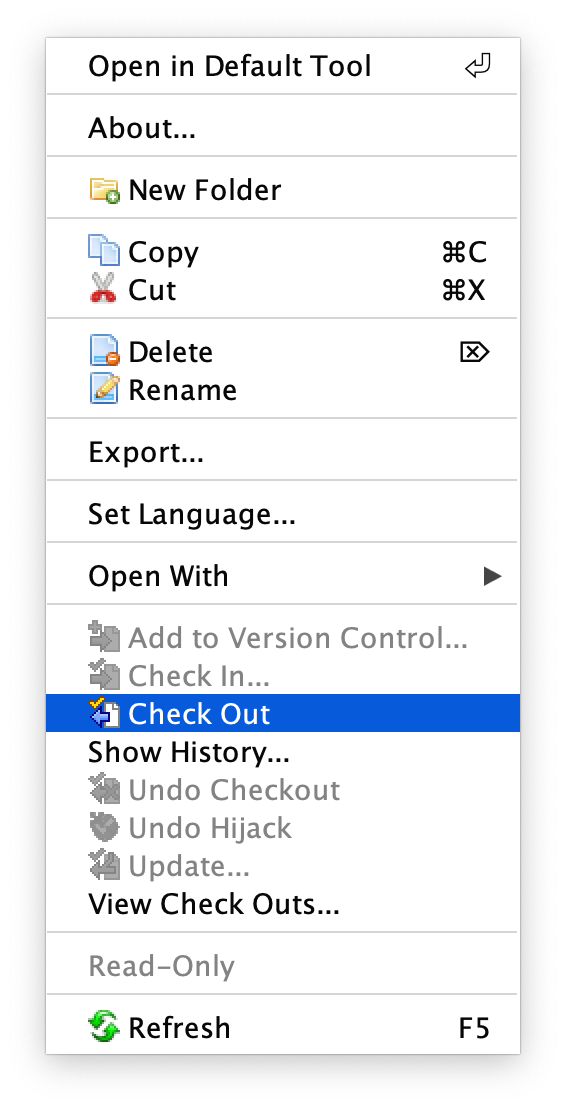
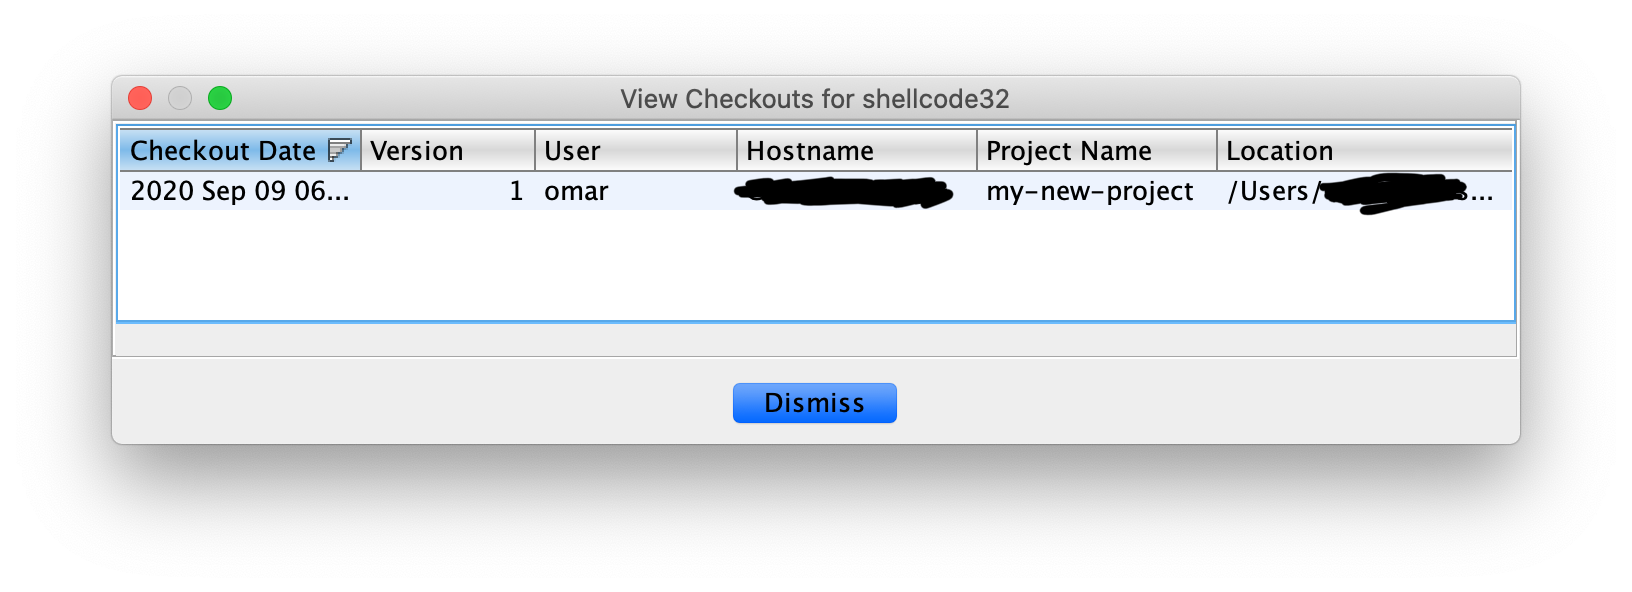
Ghidra’s concept of a check out is a little different than git. Ghidra keeps track of all users that have currently checked out a file. You can see who has a file checked out by right clicking on it and selecting View Check Outs. You’ll then be presented with this table
Why does it matter who has a file checked out? This comes into play when changing the memory map or language of a program. You may have noticed when checking out that you had the option of requesting an exclusive check out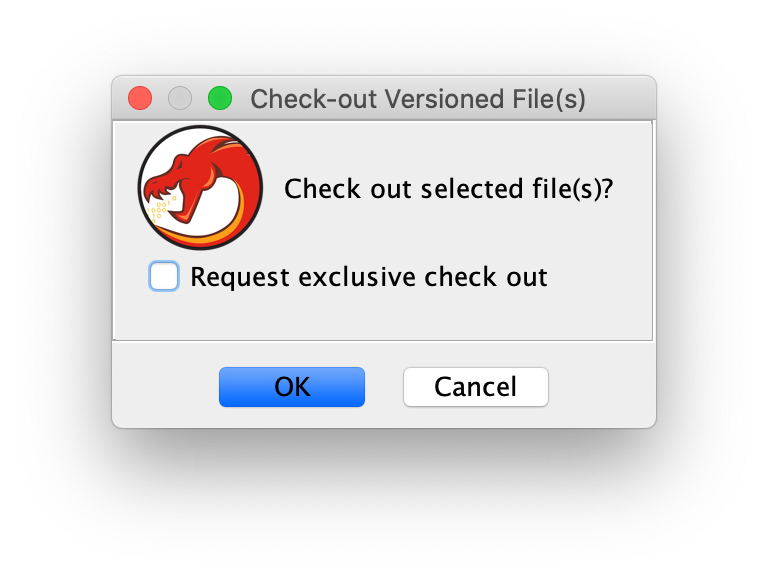
If you try to modify the memory map or change the language of a file that you did not request an exclusive check out for, and you are not the only user that currently has the file checked out, Ghidra will refuse to do so. These modifications have significant ramifications to the rest of the annotations make, so Ghidra needs to ensure exclusive access to the file. If you need to make these changes, you would typically notify the rest of the users, ask them to check in their work, and then one person makes an exclusive check out. This person modifies the memory map or language, and checks in their changes. The other users will then check out the latest version and continue where they left off.
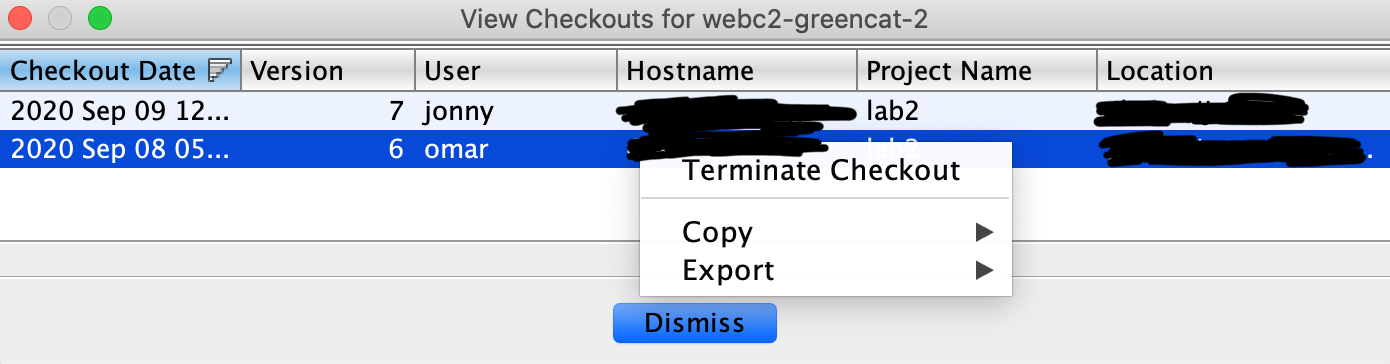
What if you need exclusive check out but there’s an active checkout from an inactive user? No problem. Project admins can terminate a check out from the View Check Outs window
Why is my file hijacked?
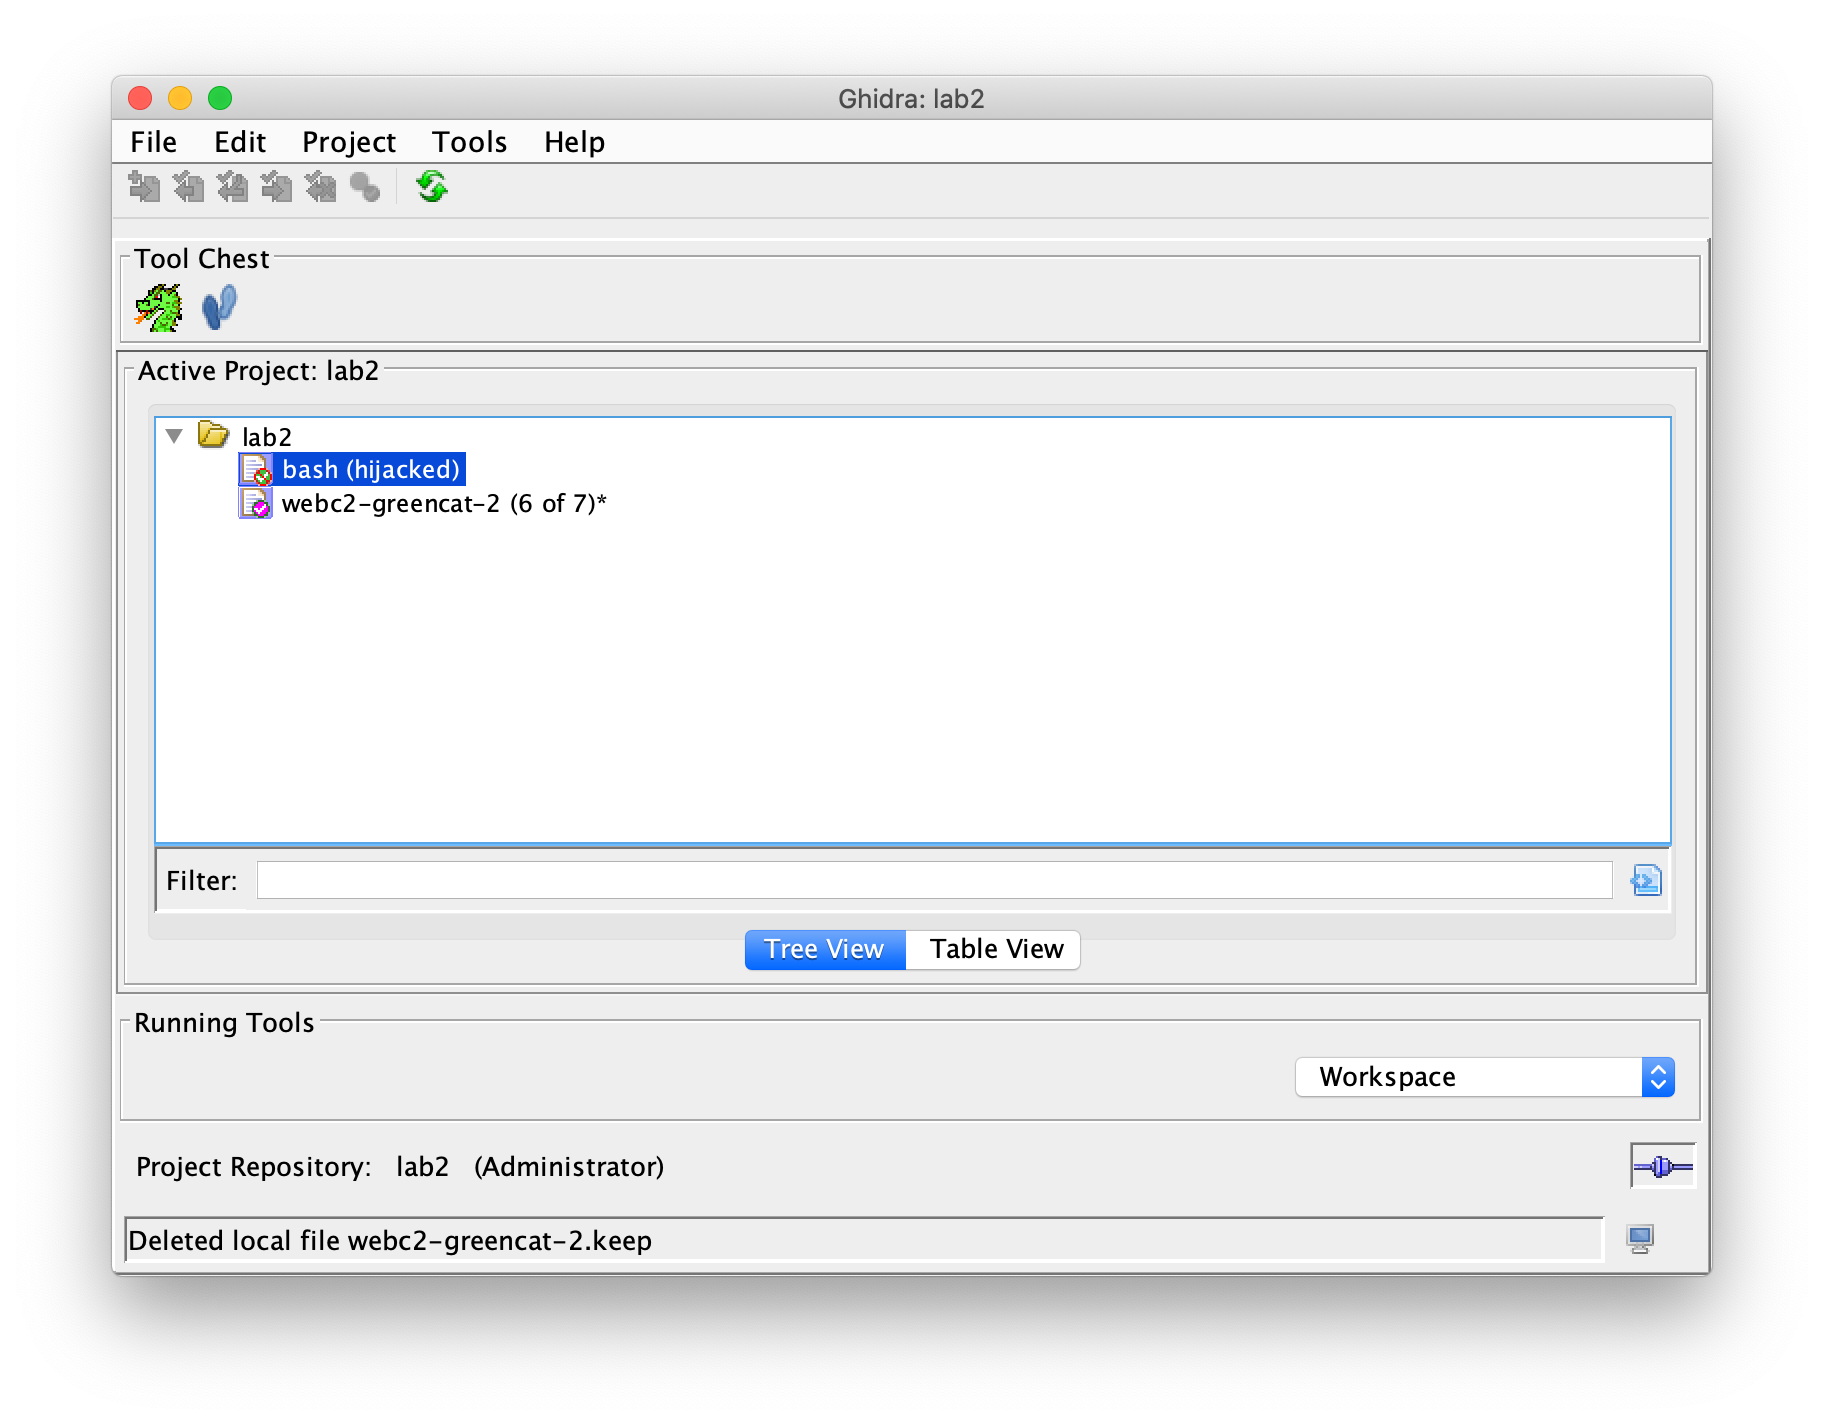
When working on a shared project, naming collisions can occur between files that have been added to the repository by another user, and a private file. Whenever this happens, the local file is marked as hijacked
To resolve this, you have 3 options:
- Right click the hijacked file and select Undo Hijack. Select the “Save a copy of the file with a .keep extension” checkbox, which does exactly as described. You will end up with your original file with a
.keepextension, and the file found on the repository gets to keep the name.
Undo hijack and keep a copy - Undo Hijack without
.keepoption. This will delete your local copy of the file in favor of the one in the repositoryUndo hijack and delete local copy - Rename your local file


How do I check in a file?
After making changes to a file, you can commit those changes to the repository by checking in the file. First, save your changes and close the code browser. From the project view, right click the file and select Check In, or click the Check In icon from the tool bar. If there’s no merge conflicts, you’ll be asked to supply a comment describing your changes. A new version of the file is created within the repository.
This is like
| |
How do I pull in new updates to a checked out file?
You can pull in changes for a checked out file from the latest version before checking in your changes. First, save your work and close the code browser. From the Project View, right click on the file and select Update, or click the Update icon from the tool bar. If there’s no merge conflicts, your local file is automatically updated.
This is like git pull.
How do I revert my local changes?
Right click a file within the Project View and select Undo Checkout. Select which files you’d like to revert. If you don’t select the .keep option, this will discard your local changes and revert back to the latest version of the file. This is like git checkout. If you do select the .keep option, your local changes are copied to a new file.
This is like git stash and git checkout
How do I see what changes have been made to a file?
As expected from any version control system, Ghidra Server maintains commit history for each file within a project. To view this history, right click a file and select Show History. You’ll then be presented with a table of versions for the file, when they occurred, who made the commits, and what comment they added
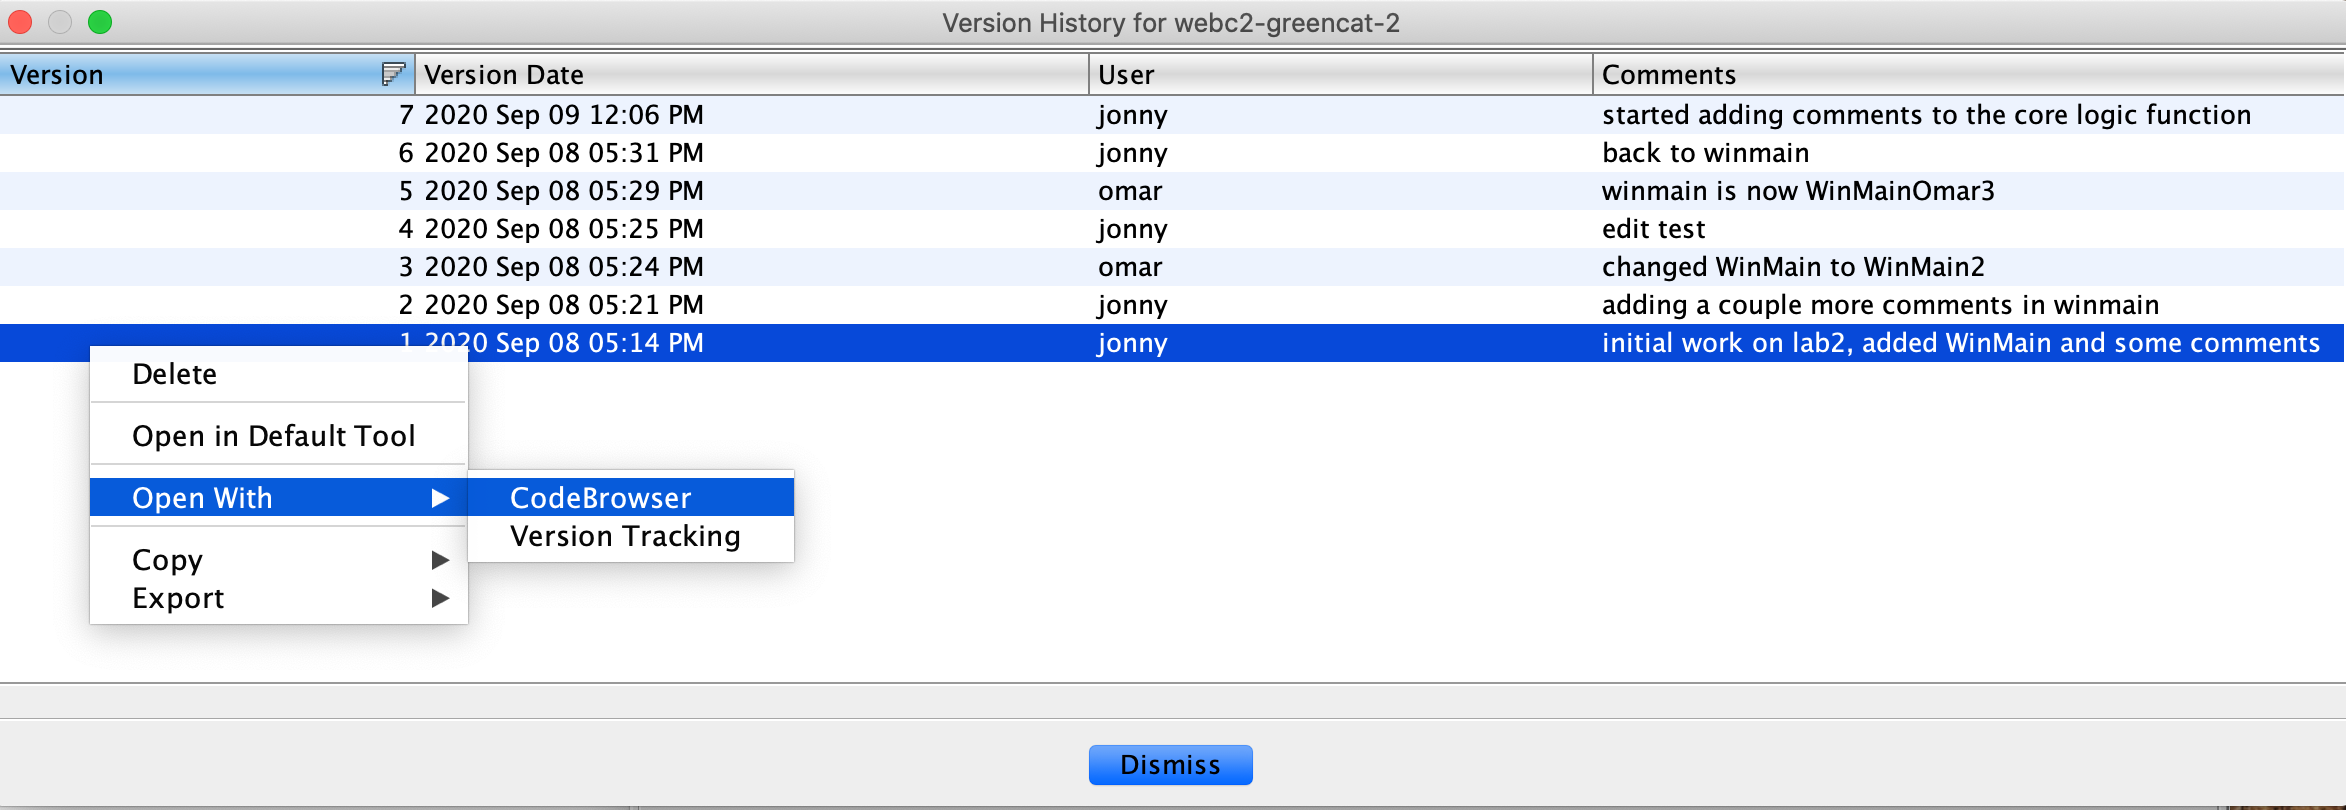
You view any of these versions by right clicking and selecting Open in Default Tool or Open With. When viewing an older version, you cannot save changes directly to the file, but you can save a copy. This copy can then be added back to the repository. If you wish to revert to an older version, after adding this new copy delete the old one and rename the new copy back to the old name.
How does merging work?
When you check out, check in, or pull updates to a file where your local copy has changes, a merge occurs. Ghidra will then try to merge as many changes as it can automatically
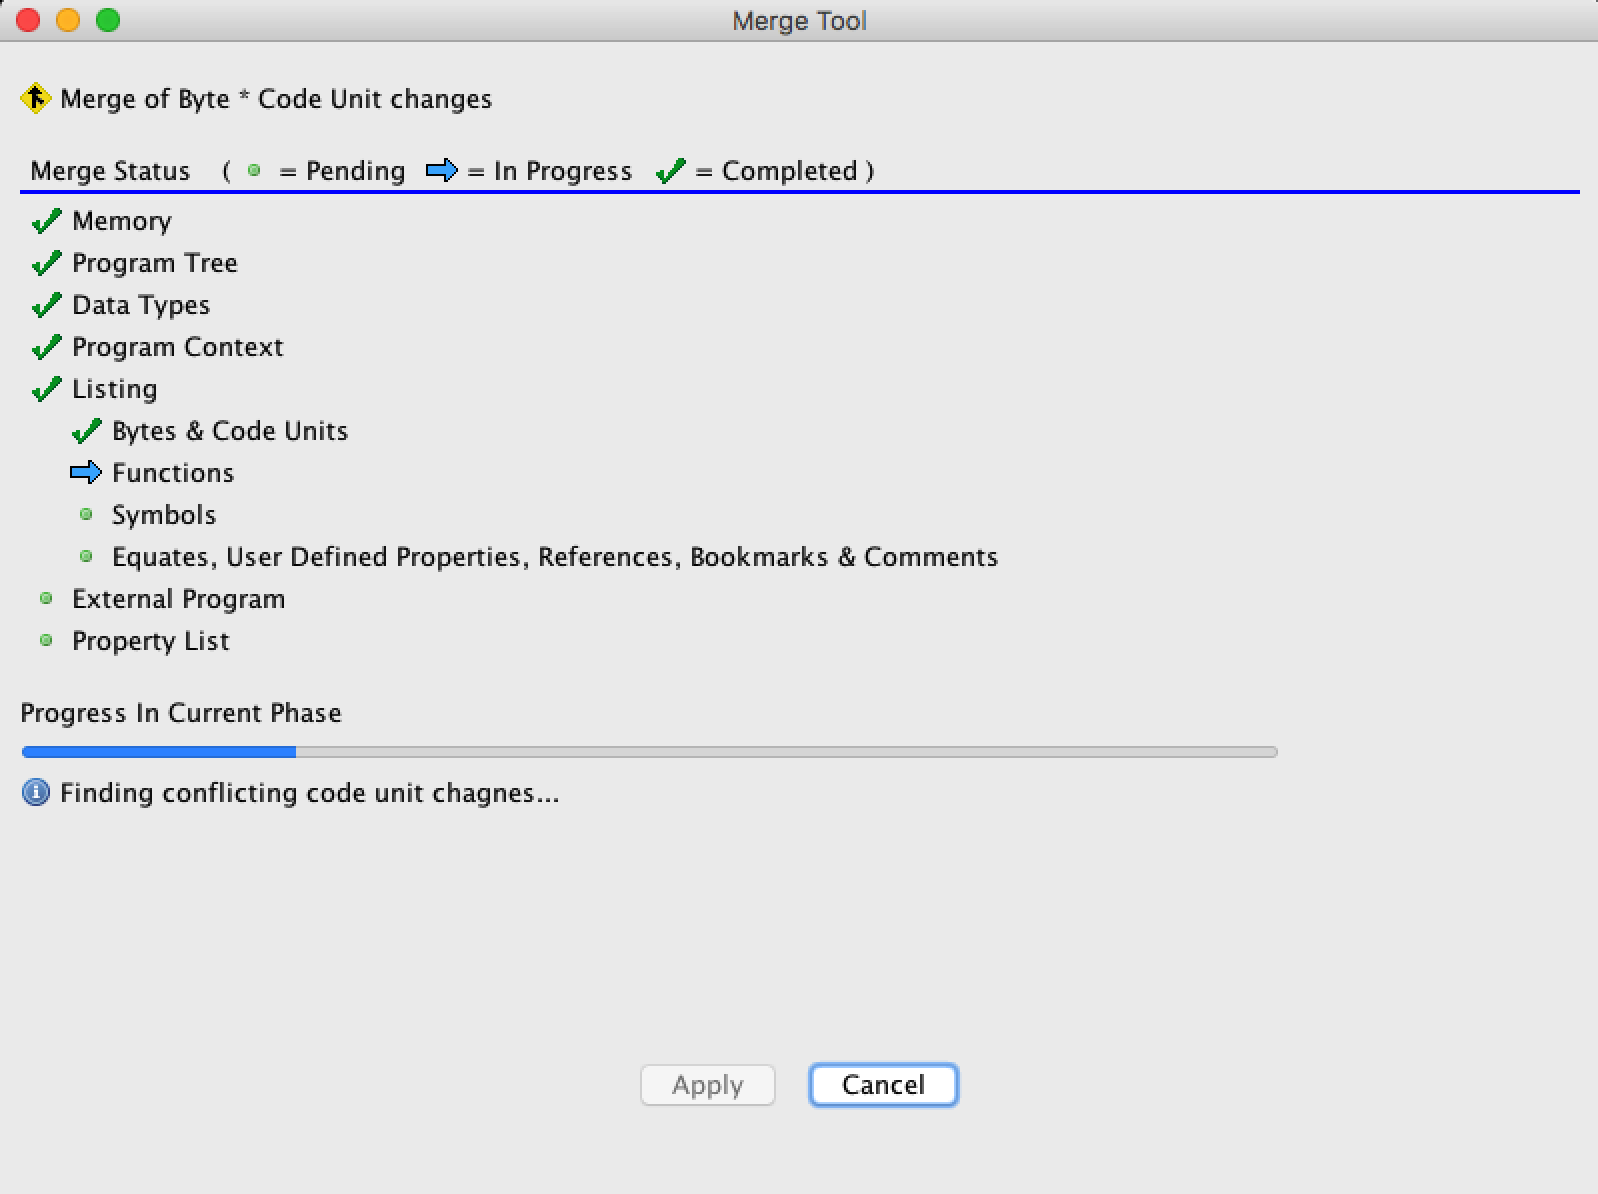
However, a merge conflict can occur when the same type of change is made to the same thing. When this happens, you’re asked to resolve the conflict by either choosing your changes, or the changes found in the latest version:

Conclusion
With what you’ve learned, you should be able to bootstrap a shared project with ease. Whatever I didn’t cover here, there’s a good chance its covered in the Ghidra help documents so I encourage you to dive in for the nitty-gritty details.
